PHARMA Southern Africa
PHARMA Southern Africa LIVER-SCREEN® | LIVER-SCREEN® — Transaminase
PHARMA Southern Africa LIVER-SCREEN® | LIVER-SCREEN® — Transaminase
Couldn't load pickup availability
Low stock: 1 left

 Approved by Experts
 Personalised Health
 Delivered Nationwide


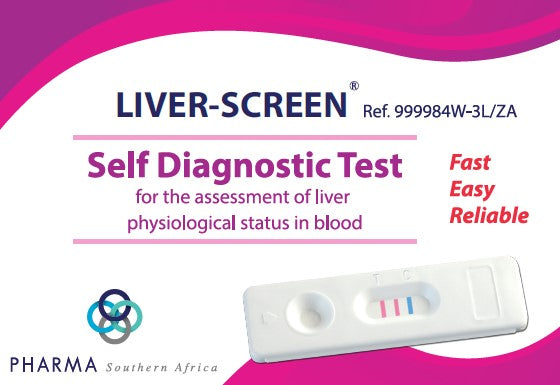
Pharma Southern Africa Liver-Screen® — Transaminase Liver SCREEN® TEST
The Pharma Southern Africa Liver-Screen® is a rapid, point-of-care immunodiagnostic assay designed to detect elevated levels of alanine aminotransferase (ALT) and aspartate aminotransferase (AST) from a whole blood finger-prick sample. By identifying transaminase concentrations exceeding the threshold of 80 IU/L, this diagnostic tool facilitates the early screening of hepatic cellular damage associated with hepatitis, fatty liver disease, or drug-induced toxicity. The membrane-based test utilizes specific antibodies to yield qualitative visual results within ten minutes, enabling prompt clinical triaging. Incorporating an integrated control zone, the test ensures high diagnostic specificity and procedural validity for proactive liver health monitoring.
Product Description
The liver is an essential organ of the body having a critical role for health. It helps break down food, clean blood, produce proteins and store energy. In case of liver problems, a number of symptoms may appear including dark urine or light-coloured stool, no desire to eat, yellowish eyes or skin (jaundice), swelling in your belly, weakness or feeling very tired. There might be many reasons for a problem occurrence in liver such as hepatitis, side effects of certain medications, cirrhosis due to heavy drinking, overweight especially in case of diabetes or high blood pressure.
Many tests could be performed on the liver but the most commonly used tests are transaminases (ALT and AST) enzymes assessment. These enzymes are released in the blood by the liver in response to damage or disease.
LIVER-SCREEN® by PHARMA Southern Africa is a rapid immunodiagnostic test for the immunological detection of increased transaminase (both ALT and AST) levels from a finger prick whole blood sample. The test consists on a plastic housing containing one stick having two distinct zones for transaminases detection (red colour when positive) and one control zone (blue colour).
When Should the TEST Be Performed?
In case of liver problems, a number of symptoms may appear including dark urine, light coloured stool, no desire to eat, yellowish eyes or skin, swelling in your belly, weakness or feeling very tired.
It is recommended to perform LIVER-SCREEN®. LIVER-SCREEN® ® could be performed any time of the day.
WHAT Do I Have to Do If the Result is Positive?
If the result is positive, it means that the ALT and/or AST transaminase level in blood is higher than the norm (80 IU/L) and that you should consult a doctor to show the test result. Then, the doctor will decide whether additional analysis should be performed. Although ALT and AST level concentration is valuable in the diagnosis of liver disease, it should be used in combination with other hepatic enzymes (alkaline phosphatase, lactate dehydrogenase and gamma-glutamyl transferase) activity levels and other blood analytes such as urea, creatinine or bilirubin to evaluate the liver function. The increase in transaminases activities could be due to many others reasons (e.g. intensive exercise and being overweight). Only a doctor could make a diagnosis after considering clinical investigation and additional test results.
Included in KIT
A sealed aluminum pouch containing:
- 1 test device, 1 plastic pipette and 1 desiccant bag (only open the protective pouch when you are ready to use the test. The desiccant bag should not be used).
- 1 sterile lancet for blood sampling.
- 1 dropper bottle containing 1 mL of diluent.
- 1 leaflet
- 1 alcohol pad
How to USE
Testing procedure always starts with a good preparation. Place the content of the box on a clean, dry and flat surface (e.g. table). Then the testing follows:
- Wash your hands thoroughly. Use soap and warm water. Dry your hand with clean towel.
- Prepare the test device and the pipette. Take them out from the protective pouch (tear at the notch) and place them in the reach of your hands (you will need them later). Discard the desiccant bag.
- Prepare the lancet. Hold the lancet without touching the trigger button. Unlock the lancet cap twisting it off 1⁄4 turn until you feel it separates from the lancet and then continue twisting it (2-3 rotations). Don’t pull just twist and discard the cap when finished.
- Clean the end of the middle finger or ring finger with the alcohol swab. Rub the chosen finger towards the tip for 10 to 15 seconds to enhance the blood flow.
- Press platform firmly against the lateral side of the previously cleaned finger, and press the release trigger button.
- The tip will automatically retract into the body of the device.
- Rub the finger’s end to obtain enough whole blood sample.
- Without pressing the bulb, put in contact the plastic pipette with the blood sample. The blood migrates into the pipette through capillarity to the line indicated on the pipette. You may rub again your finger to obtain more blood if the line is not reached. As far as possible, avoid air bubbles.
- Put the blood collected with the pipette into the sample well of the device, by pressing on the pipette bulb.
- Wait 30-40 sec for the blood being totally absorbed into the sample well. Unscrew the blue cap of the diluent dropper bottle (leave the white cap tightly screwed) and add the diluent as follows: Hold the diluent dropper bottle vertically and slowly add exactly 4 drops in the sample well of the device with an interval of 2 3 seconds between each drop.
- Read the result after 10 minutes. Do not interpret after 15 minutes.
Click here to view the patient information leaflet.