PHARMA Southern Africa
PHARMA Southern Africa PROSTA-CHECK® | PROSTA-CHECK® — Early Prostate Health
PHARMA Southern Africa PROSTA-CHECK® | PROSTA-CHECK® — Early Prostate Health
Expiry date: 2026-07-31
Couldn't load pickup availability
Low stock: 2 left

 Approved by Experts
 Personalised Health
 Delivered Nationwide


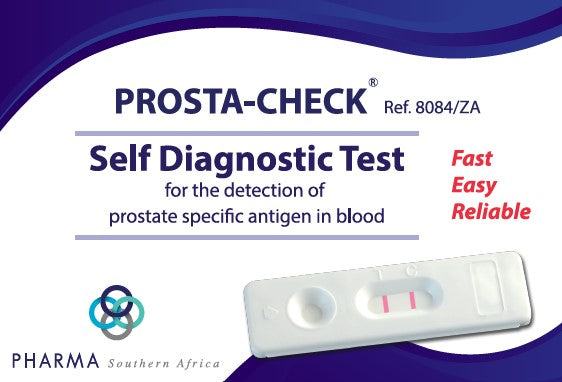
Pharma Southern Africa Prosta-Check® — Early Prostate Health PSA Self-TEST
The PROSTA-CHECK® rapid test is a semi-quantitative immunological diagnostic tool designed for the detection of elevated prostate-specific antigen (PSA) levels in whole blood, serving as a critical resource for early prostate health screening. Utilizing specific monoclonal antibodies, the assay identifies PSA concentrations exceeding the clinical threshold of 4 ng/mL, providing a vital physiological indicator of potential prostatic pathologies such as benign prostatic hyperplasia, prostatitis, or adenocarcinoma. This convenient home-use screening device facilitates proactive health monitoring for men over 50 or those with a predisposing family history, enabling timely clinical consultation and significantly improving therapeutic outcomes through early detection.
Product Description
In men, the prostate antigen (PSA) is secreted by the prostate. This gland, situated in the abdomen under the bladder, surrounds the initial part of the urethra and plays an important role in the semen. The prostate antigen level gives information about the prostate physiological condition. Thus, levels above the norm may show pathology of the prostate (benign hypertrophy, prostatitis and cancer, etc.). The PSA assay could be performed at least once a year in men over 50 years or having a family history of prostate problems.
In case of prostate problem, early screening allows considerably increasing recovery possibilities.
When Should the TEST Be Performed?
The PROSTA-CHECK® test can be performed at any time of the day.
However, in the following cases, it is recommended to wait the indicated time before using the test, to avoid false positive results:
- Cycling/Ergometry 24 hours
- Ejaculation 24 hours
- Prostate massage 2-3 days
- Transrectal ultrasounds 2-3 days
- Cystoscopy 1 week
- Prostate transurethral resection / biopsy 4-6 weeks
WHAT Do I Have to Do If the Result is Positive?
If the result is positive, it means that the PSA level present in your blood is higher than the norm (4 ng/mL) and that you should consult a doctor to show him the test results.
Included in KIT
A sealed aluminum pouch containing:
- 1 test device, 1 plastic pipette and 1 desiccant bag (Only open the protective pouch when you are ready to use the test. The desiccant bag should not be used).
- 1 dropper bottle containing 1 mL of diluent
- 1 sterile lancet for blood sampling
- 1 instruction leaflet
- 1 alcohol pad
Not provided necessary material: absorbent cotton and alcohol 70 % vol. or alcohol pad.
How to USE
Testing procedure always starts with a good preparation. Place the content of the box on a clean, dry and flat surface (e.g. table). Then the testing follows:
- Wash your hands thoroughly. Use soap and warm water. Dry your hand with clean towel.
- Prepare the test device and the pipette. Take them out from the protective pouch (tear at the notch) and place them in the reach of your hands (you will need them later). Discard the desiccant bag.
- Prepare the lancet. Hold the lancet without touching the trigger button. Unlock the lancet cap twisting it off 1⁄4 turn until you feel it separates from the lancet and then continue twisting it (2-3 rotations). Don’t pull just twist and discard the cap when finished.
- Clean the end of the middle finger or ring finger with the alcohol swab. Rub the chosen finger towards the tip for 10 to 15 seconds to enhance the blood flow.
- Press platform firmly against the lateral side of the previously cleaned finger, and press the release trigger button.
- The tip will automatically retract into the body of the device.
- Rub the finger’s end to obtain enough whole blood sample.
- Without pressing the bulb, put in contact the plastic pipette with the blood sample. The blood migrates into the pipette through capillarity to the line indicated on the pipette. You may rub again your finger to obtain more blood if the line is not reached. As far as possible, avoid air bubbles.
- Put the blood collected with the pipette into the sample well of the device, by pressing on the pipette bulb.
- Wait 30-40 sec for the blood being totally absorbed into the sample well. Unscrew the blue cap of the diluent dropper bottle (leave the white cap tightly screwed) and add the diluent as follows: Hold the diluent dropper bottle vertically and slowly add exactly 4 drops in the sample well of the device with an interval of 2-3 seconds between each drop.
- Read the result after 10 minutes. Do not interpret after 15 minutes.
Click here to view the patient information leaflet.
Click here to view a video of the test procedure.